Our country pages
Africa
Europe
Search
Installation of bituminous membrane on a gradually sloping roof
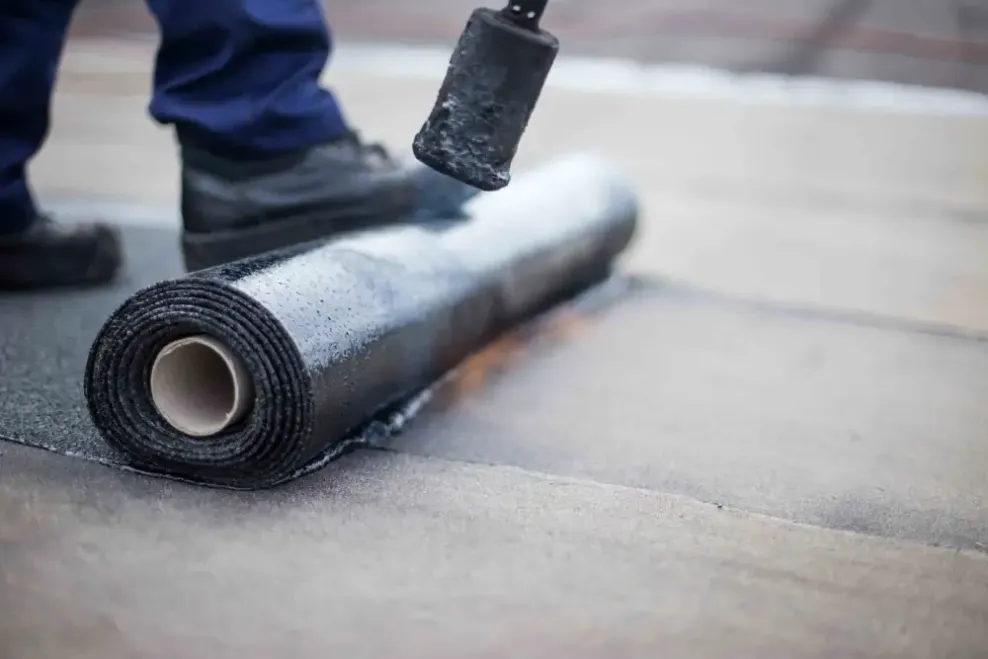
Installation of BMI Icopal bituminous covering
Waterproofing of gradually sloping roofs is normally done using bituminous membrane, a durable and flexible material. Bituminous covers are a so-called continuous type of covering, which means that their seams can withstand water pressure. As the term is used here, a “gradually sloping” roof is a roof with a pitch of 1:10 or less. To ensure drainage of water, even flat roofs should always have some amount of inclination towards the roof drains.
Jump to section
Waterproofing for a sloping roof should always be installed by a bitumen roofing professional
Installation of waterproofing on a sloping roof requires professional expertise, and as such, the installation described here should always be carried out by a professional who specialises in waterproofing bituminous roofs. Hot-work is normally required in this type of installation, so the installer must have a valid hot-work card and hot-work permit.
Installation instructions for bituminous membrane
On this page, you will find some illustrative instructional videos on the waterproofing of gradually sloping roofs. However, you should always follow the installation instructions – i.e. the work instructions – when installing bituminous membranes. The videos are not a substitute for the instructions on waterproofing of sloping roofs, or for waterproofing structures designed by structural engineers.
Installation of bituminous membrane – Instructional videos
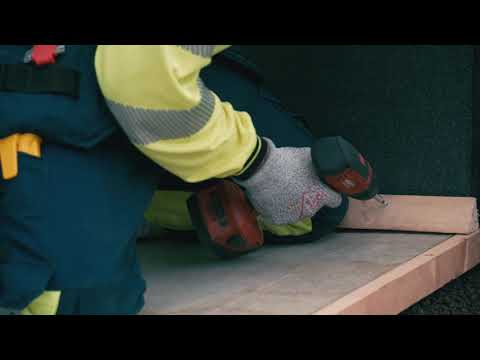
Installation of thermal insulation on a gradually sloping roof
Underneath the thermal insulation is a vapour barrier membrane and a flat substrate. The thermal insulation should be installed on top of the vapour barrier membrane. Arrange the thermal insulation panels in place using a method known as “brick-stacking”, wherein the seams of the panels do not form a grid pattern. The seams of the thermal insulation layers should not be in the same spots – instead, they should be installed in such a way that they overlap each other. Work the thermal insulation into the proper shape using a wool-knife and a handsaw.
 Installation of thermal insulation on a gradually sloping roof
Slant adjustment on a sloping roof
A gradually sloping roof is never perfectly flat – it always has inclines that allow water to drain. As a general rule, such inclines are already built into the roof’s structure. In some cases, the slant of the roof is adjusted during the renovation of the roof, in order to ensure (e.g.) adequate sloping in the direction of the roof drains.
The slant is adjusted using expanded clay, on top of which grooved mineral wool or thermal insulation layers are installed. The waterproofing is installed on top of the thermal insulation layer.
 Slant adjustment on a sloping roof
Hot-gluing a bituminous membrane to a sloping roof
Some bituminous membranes are attached to their substrate by adhesive bonding. Melted bitumen is used as a bonding agent. Special care is required when working with hot bitumen – Stelox blown bitumen can be used at temperatures of 200 - 230°C, and Vedagum EBH rubber bitumen can be used at 170 - 210°C. The temperatures specified for the use of these materials must not be exceeded.
When you are working with/near a bitumen pot, certain equipment needs to be used, such as special “pot gloves” with long shafts for the arms to fit in, and tightenable openings to ensure that no molten bitumen gets on the inside of the gloves.
 Hot-gluing a bituminous rubber membrane to a sloping roof
Welding a bituminous membrane to a gradually sloping roof
Welding of a bitumen membrane involves melting the protective plastic on the underside of the membrane and heating the bitumen to a molten state. Press the seams tightly into place; when doing this, ensure that a small amount of bitumen squirts out to a distance of at least 10 - 15 mm from the seam.
If one uses the stripe-welding option, only the stripes on the underside of the bitumen membrane should be melted. At the end-seams, the membrane should be heated so that it adheres to the substrate over the entire area of the seam.
Welding a bituminous membrane to a gradually sloping roofInstalling an upright section of membrane on a sloping roof
Upright sections serve to prevent water from getting into (e.g.) the joints between the roof and the wall structure. Upright sections are installed separately for the base and surface membranes, respectively. Base membrane: at the wall or eaves, bring the base membrane up to the top edge of the triangular lath, and press it tightly into place. Cut a separate upright piece from the membrane, as well, according to the dimensions of the wall or eaves – though it should be at least 300 mm – to be placed on the vertical surface at the joints of the wall.
Install the upright piece tightly against the eaves or wall, and also make it overlap with the roof surface. Secure the piece’s attachment using fasteners at the top. Surface membrane: weld the upright pieces on top of the base membrane pieces. They should extend a longer distance than the upright pieces of the base membrane, both on the roof surface and on the wall/eaves. At the eaves, turn the upright piece of the surface membrane so that it goes over the eaves, forming a so-called “flood” membrane.
 Installing an upright section of membrane on a sloping roof
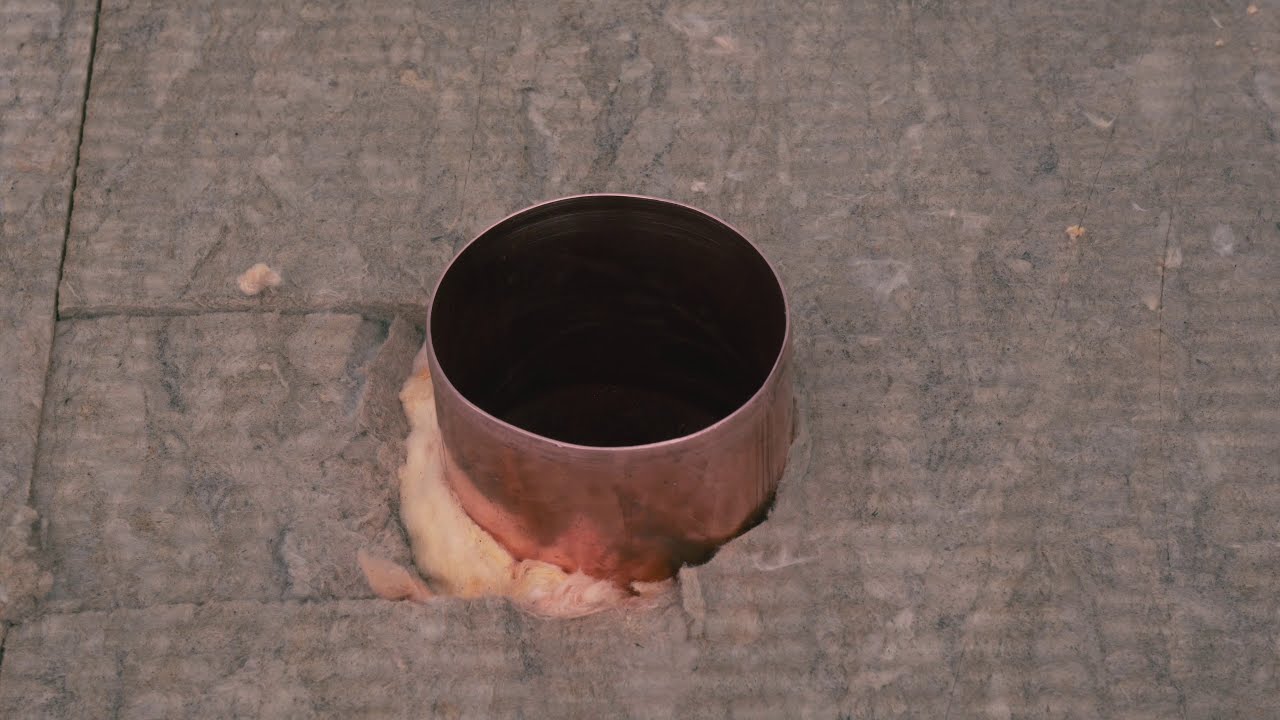
Installing a roof drain on a sloping roof
A roof drain should be installed on a hard substrate. If the substrate is wool, then a separate sheet of plywood should be installed, attached using fasteners at the corners, to serve as the base for the roof drain. Install a LaippaPolar outlet-sealing membrane, with the gauze surface facing downwards, where the underside of the roof drain will be. Install the drain in place, and seal it, with another LaippaPolar membrane, which you should install with the gauze surface facing upwards this time. Thereafter, affix the base and surface membranes around the drain according to the instructions.
 Installing a roof drain on a sloping roof
Installation of an underpressure vent, or other outlet, on a gradually sloping roof
Cut a hole in the substrate according to the size of the outlet you are installing. On the underside of where the outlet will be, install LaippaPolar outlet-sealing membrane, with the gauze surface facing downwards. Instal the outlet in place, and seal it, with another LaippaPolar membrane, which you should install with the gauze surface facing upwards this time. Thereafter, affix the base and surface membranes around the outlet, according to the instructions.
 Installation of an underpressure vent, or other outlet, on a gradually sloping roof
Installing an overflow pipe on a gradually sloping roof
Attach the base membrane at the eaves, extending it up the top of the triangular lath. In the eaves structures, make a hole for the outflow pipe. Cut a piece of the LaippaPolar outlet-sealing membrane to place where the underside of the outflow pipe will be, and weld it in place with the gauze surface face down.
Cut a hole in the LaippaPolar membrane for the outflow pipe. Install the outflow pipe in place, and seal it with another LaippaPolar membrane, which you should install with the gauze surface facing upwards this time. Thereafter, affix the base and surface membranes around the outflow pipe, according to the instructions.
 Installing an overflow pipe on a gradually sloping roof
Installing a drip tray on a gradually sloping roof
In the case of a clear-coloured tray, the surface should be roughened and pre-treated with a bitumen solution. In the case of a painted tray, the surface should be roughened. The drip tray should be installed 20 - 30 mm away from the end of the eaves. In double-layer covering structures, the drip tray should be installed between the base and surface membrane. The tray should be mounted with screws at intervals of 100 mm, in a zig-zag pattern.
At the continuation points, cut a 30 mm piece from off the drip edge of a panel to be inserted on the inside, and insert the cut panel into the other panel’s profile. Cut the corner points according to the profile of the panel, so that the panels will overlap with each other. Weld the surface membrane to the drip tray, and press it tightly into place.
 Installing a drip tray on a gradually sloping roof
Installation of expanded-clay roofing
Installation of expanded clay:
The grain size of expanded-clay roofing should be selected according to the thickness of the expanded-clay layer. Load the expanded clay into a lift-van and pour it, in an even layer, onto the area to be filled. Ensure that there is sufficient expanded-clay filling in the narrow and shallow spaces by shovelling the expanded clay into place. Finally, level the expanded clay according the top edge of the sloping laths.
Pouring a concrete slab:
Place the casting fabric under where the concrete casting will be, and add more fabric as the casting progresses. Pour the concrete in an even layer, and spread the concrete mix into an even and uniform layer. Level the surface of the concrete casting according to the edges of the drain, in such a way as to ensure that there will be adequate sloping in the direction of the drain.
 Installation of expanded-clay roofing
Safety on the job
When one is working on a roof, safety is of paramount importance. Always follow the safety instructions for the job site where you are working, and do your part to make sure that it is safe for others to work on the site as well. In the installation of bituminous coverings, besides the general safety instructions, one should also take special care and caution when working with hot bitumen and when otherwise doing hot-work.
Icopal Katto Oy – general safety orientation
Icopal Katto Oy – general safety orientation
Everyone working on a construction site is responsible not only for their own safety, but also for the overall safety of the site. Watch the video to see Icopal Katto Oy’s general safety orientation.
 Icopal Katto Oy – general safety orientation
FAQ about Green Roofing
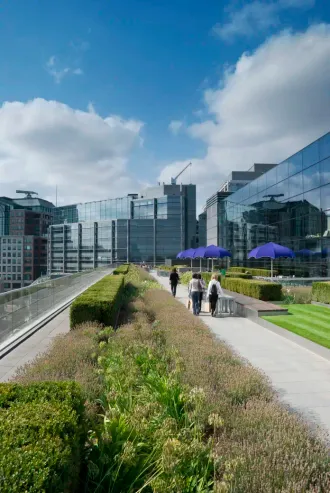
What is a green roof?
A green roof is a flat or sloping roof covered with vegetation. When building a green roof, it’s important to think about its composition, which must be made up of layers of different but interacting materials to ensure
- water accumulation
- water tightness
- protection against root action
- mechanical protection
- draining and filtering activity
- nutrients get to the plants.
Are green roofs eco-friendly?
Green roofing has a lot of benefits when it comes to dealing with sustainability, the environment and climate change concerns, particularly smog and pollution. These benefits include
- encouraging wildlife: rooftop habitats can provide a 'green link' that connects natural pockets of habitat to each other. They can also provide isolated habitats that are not disturbed by other green areas at ground level
- improving air quality: green roof plants improve air quality by absorbing atmospheric carbon dioxide and releasing oxygen.
- improving temperature regulation: through the daily cycles of condensation and evaporation, plants are able to cool and humidify the surrounding air, improving the microclimate
- reducing and slowing stormwater runoff: in urban areas in certain climates, green roofs can retain nearly all storm-related water during the summer months, and up to 20% during the winter months.
What are the best plants to use on a green roof?
It is often best to plant species on a green roof that require minimal maintenance. Vegetation composed of sedum essences can survive extreme drought and easily regenerate and self-propagate.
Green roof design can also include Blue Green Roof technology, which offers all the performance features typical of green roofs while offering the possibility of storing, conserving and reusing rainwater. It is also a useful solution for reducing the effects of extreme rainfall that can cause localised damage.
What is the most eco-friendly roofing material?
When it comes to choosing roofing materials, strong, durable and - more recently - eco-friendly characteristics are most often selected. These traits are available in both materials and solutions. For example:
- wooden shingles: these are shingles made from shredded wood from controlled forests
- slate and clay roof tiles: terracotta roof tiles are made from porous ceramic with clay as its base. Clay is a natural material and has been used in the building process for centuries due to its durability and low maintenance
- solutions with unique characteristics: such as Noxite bituminous waterproofing membranes, which not only provide a high-quality flat roof, but reduce pollution by using the sun to transform harmful nitrogen oxides (NOx) into harmless nitrates, which are washed away by the rain. Noxite is a highly effective means of reducing the ongoing environmental impact of a building as it continues to function throughout the life of the roofing membrane
- green roofs: the green roof solution reduces the heat island effect, boosts the insulation capacity of the environment below and improves air quality
- cool and white roofs: these reduce roof radiation by reducing overheating and so the air conditioning required.
Are green roofs expensive?
The price of a green roof depends on the size of the roof, the steepness or pitch, the type of green solution chosen and the vegetation planted. When considering the cost, remember to take into account the benefits of green roofs as a source of clean air, emotional wellbeing and environmental diversity.
If you’re investing in a green roof, it’s important to know exactly what the benefits are so that you get a great return on investment:
- roof membrane protection: vegetation on a roof deck protects the roof surface from the extremes of weather, temperature and UV radiation, which can significantly increase its lifespan
- reduced storm water run-off: water is stored by the green roof substrate and then taken up by the plants, where it is returned through transpiration and evaporation into the atmosphere. The drainage layer in green roofs also delays the rate at which water run-off occurs, reducing stress on drains and sewers during heavy rainfall
- reduced energy costs: the layers of a green roof system improve the thermal performance of the roof, helping to keep the rooms below cool in summer and warm in winter (although this effect is generally not included in any U-Value calculations).
How long do green roofs last?
Green roofs can extend the life cycle of a roof for more than 30 years as its layering makes it more durable than normal roofs. It is important, though, that the membrane and the stratigraphy (or layers) are correctly installed.
How long does a flat roof last?
A flat roof usually has an average lifespan of about 15 years. Many of its components require maintenance from time to time and, if this is not done, the roof can be damaged by infiltration. To make the roof last as long as possible, it is important to carry out frequent inspections and work on the drainage system.
How frequently should roof maintenance be performed? And what does this involve?
The health of the roof changes over time depending on the attention you give it. To ensure high quality roof products remain fully functional over decades, it is essential to follow a regular maintenance programme.
Maintenance problems normally include infiltration, cracks in the roof covering or tiles, deterioration of the membranes and insulation. If not repaired, the roof's insulating performance will decline.
Inspect your roof after storms and high winds, and at major discontinuity points, and clean it periodically.
And remember to check your product’s warranty, whether you have installed just a few tiles or an entire roof system. A good warranty can protect you from costly repairs in the future.
How do you install a green roof?
A green roof is a surface that needs to be made waterproof to avoid damage from water seeping in. So, it is essential to have an anti-root membrane and a draining layer that will help carry away excess water from the rain or gutters.
Then, adding a drainage mat and felt layer will allow the water to pass through and the roots to attach themselves to the growing medium. The drainage layer will then provide the growing platform for the green roof. The composition of the soil is also important as it aids proper plant nutrition and growth.
Finally, the roof must include an irrigation system, possibly water-based, so as not to overload the roof, and reduce water consumption and waste.
If you choose an intensive green roof, you can plant classic garden plants, both herbaceous and shrubs. If you opt for an extensive green roof, low-lying and creeping plants are best as they are suitable for growing in thin layers of substrate.
What is a blue roof and why is it considered environmentally friendly?
A blue roof can be key to sustainability in buildings, particularly in urban areas where a ground level solution may not be possible due to lack of space. Benefits of a blue roof include
- temporarily store rainfall to reduce runoff
- reduce the flow rate of water from the roof
- store water for reuse in other areas of the building, such as irrigation or cooling
- make up the drainage and support layers for green roofs
- Easy to maintain.
If your business is located in an area particularly prone to flooding, then a blue roof system can also help to protect your building (and neighbouring ones) from damage.
Contact Us
Contact our local team
We can support you to define solutions and services for specific country.
Media Contact
Contact us for more information on BMI Group
group.communications@bmigroup.com